I’ve realized that I still had some Rodinal in the bottom of the bottle. I’ve put the remaining solution in good use. Here are some paper negative scans from my last session. Sunny day, 10 min. exposures with Pinhole cameras no:1 and no:2. Paper negs are developed in home made Rodinal (1+12), scanned in Epson V33 (which I’ll eventually have to clean thoroughly), converted & spotted in Ps.
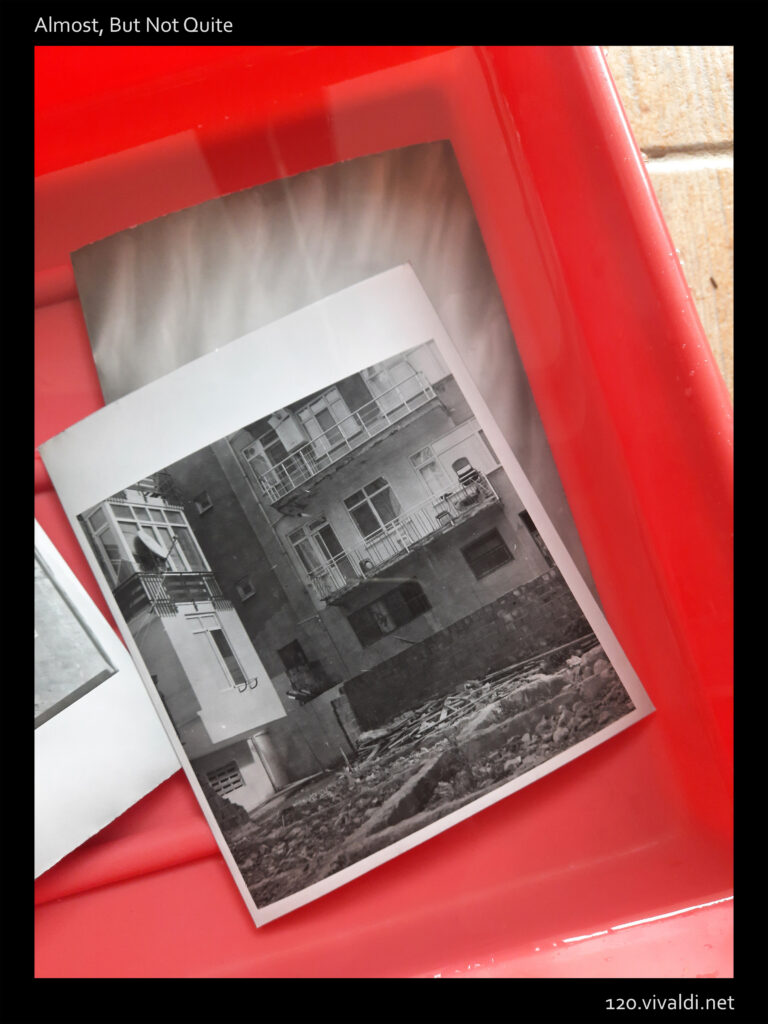
Here’s one of the first few attempts in paper reversal process. In the first tests, I can’t see any solid whites or blacks. It gets a bit trial and error (as always) and a fair bit of mental exercise to determine the right amount of exposure and dev time. There are too many variables in the process. It has 14 steps! I’m getting hang of the flow but there’s a looong way to settle in a repeatable and fruitful workflow. Still, it’s a magical process for a photography lover and I’m excited!
As I wrote earlier, my ultimate goal is to shoot and process unique, positive paper prints without using any lenses, mechanical contraptions or commercial solutions.
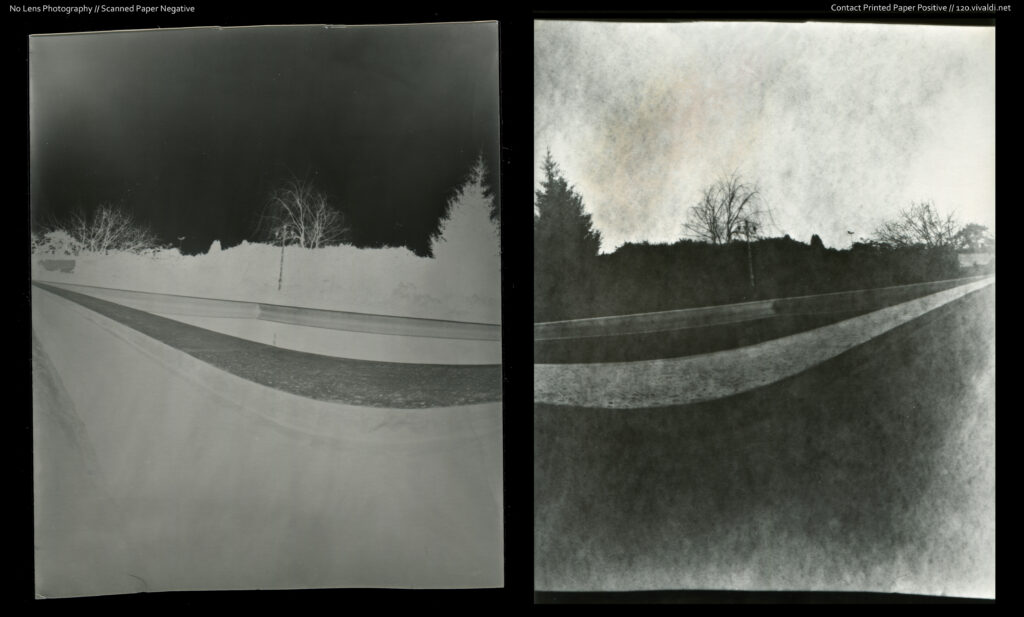
burada // Shot with “Home Made Pinhole No:2” f:221, 30 min exposure. 1st and 2nd Dev in home made Rodinal (1+10) Potassium Permanganate + Sodium Bisulfate bleach Sodium Metabilsulfite as clearing agent. 2nd exposure with enlarger (Meopta Magnifax) Scanned with Epson V33 Spotting in PS
PS: I emptied my first bottle of Rodinal. The darkroom is still freezing cold and I’m thinking about reading more before attempting to get more serious with paper reversal process. I may take a little break but I’ll make sure to share new (and hopefully better) results when I have a firmer grasp on the process.
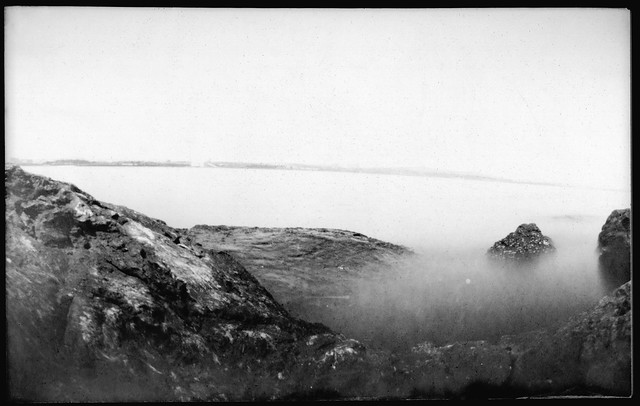
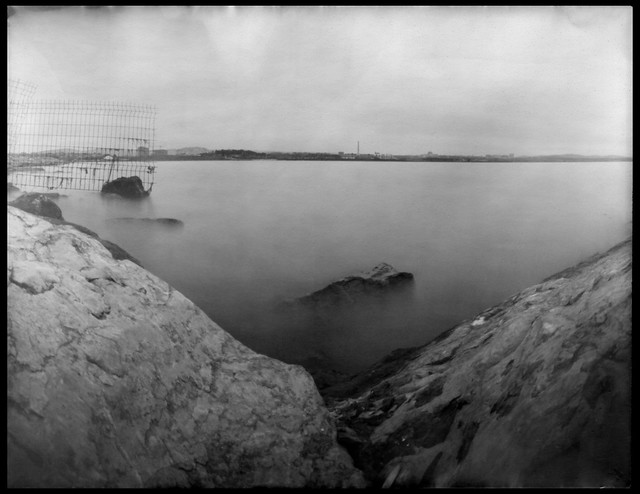
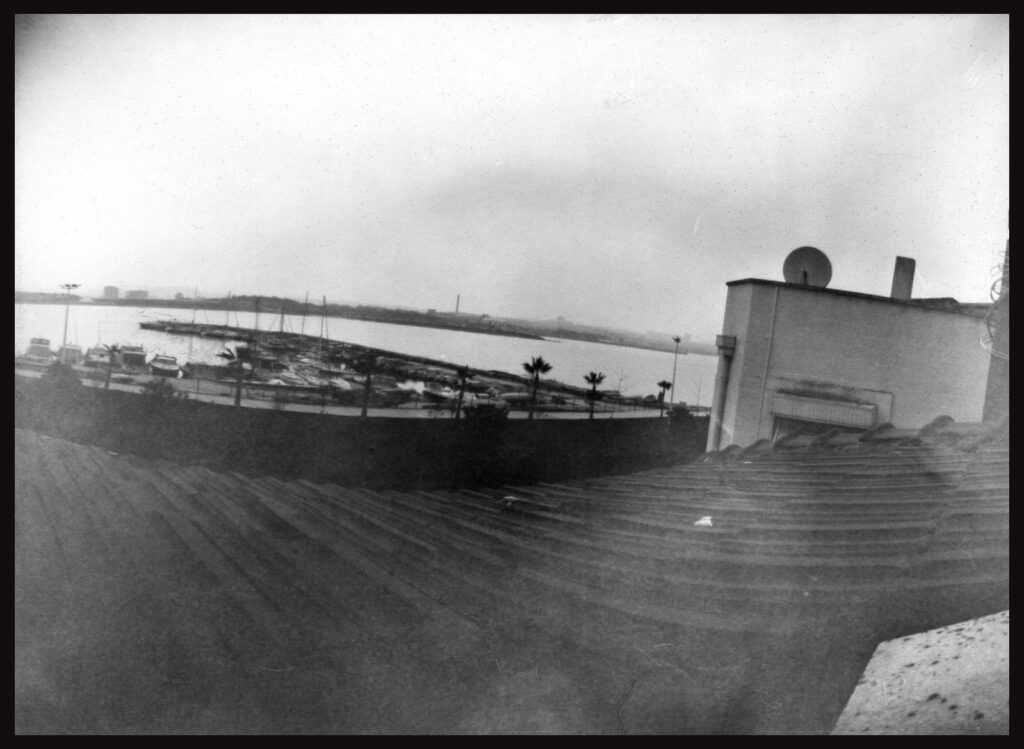
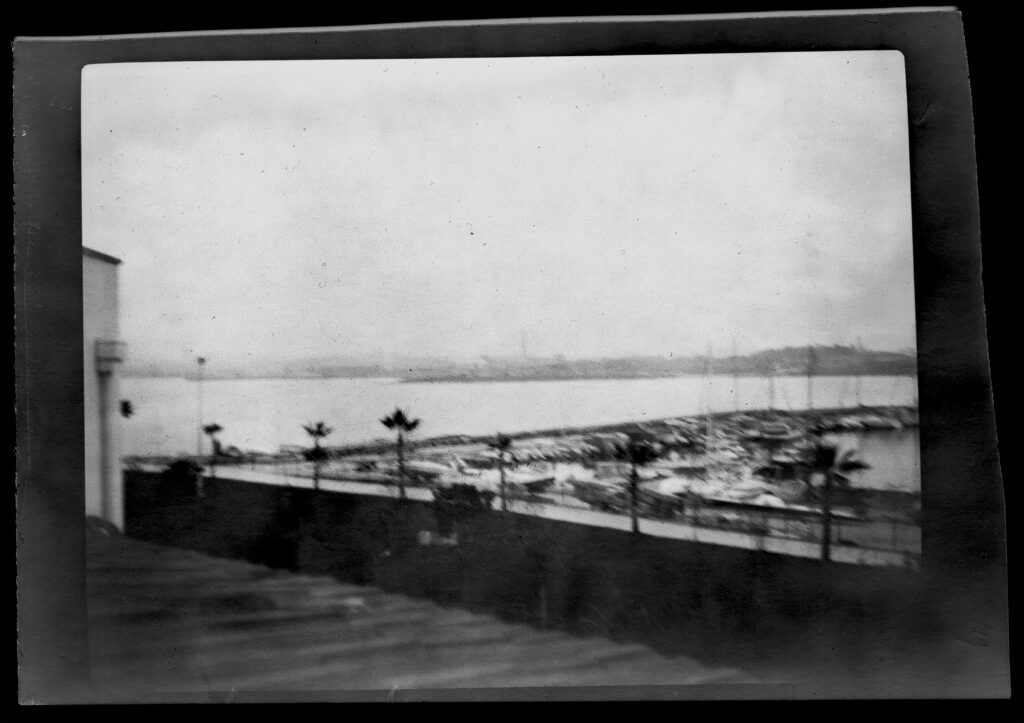
At last, I took my pinhole cameras to the seaside. I was curious about how my usual haunting grounds are recreated through the pinholes. I put Pinhole camera No:1 and No:2 on the rocks, facing opposite sides, exposed for eight minutes and enjoyed the salty breeze while waiting. Apart from funky splatters on one of the negatives, due to a slight mishap with undiluted Rodinal, I was very happy with the results. Gradually I feel more confident with the exposure and my eyes are getting acquainted with the pinhole perspective. The second, smaller pinhole camera that I’ve made works well, I like the aspect ratio of ~13:10 that it uses and I discovered that the spirit level I’m using has a magnetic strip! If I manage to paint proper framing lines on the top of the lids, I’d have everything I can think of.
Home made pinhole camera No:1 f:220, 8 min exposure FB Paper Negative rated @2ASA Approx 13×10 cm Dev. in home made (paracetamol based) Rodinal (1+20] Scanned in Epson V33 @2000 dpi Conversion & Spotting in PS
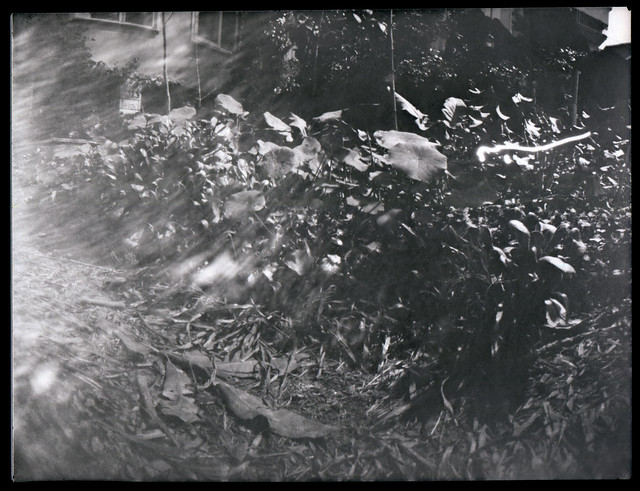
First shot with home made pinhole camera No:2* f:221, 8 min exposure FB Paper Negative rated @2ASA Approx 8×13 cm Dev. in home made (paracetamol based) Rodinal (1+20]. Scanned in Epson V33 @2000 dpi Conversion & Spotting in PS
*Messy splatter textures are caused by a mishap with undiluted Rodinal. I’m tempted to recreate the accident in a more controlled manner, to add texture to paper negatives.
My next session will be an adventurous one. I just ordered ingredients for reversal bath. I’m planning to shoot paper negatives (always with pinhole) develop them, bleach and re-develop to get paper positives. If I manage to pull that off, I’d have unique photos, created without any lens or mechanical contraptions. I truly like the idea. My home made Rodinal is nearly depleted but I think I’ve got just enough for two more sessions.
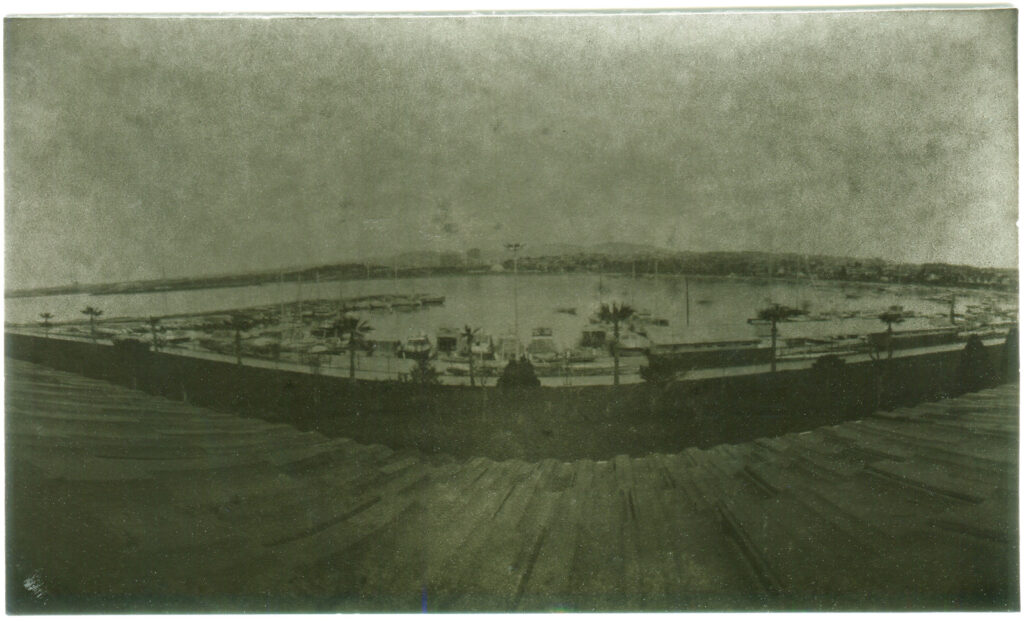
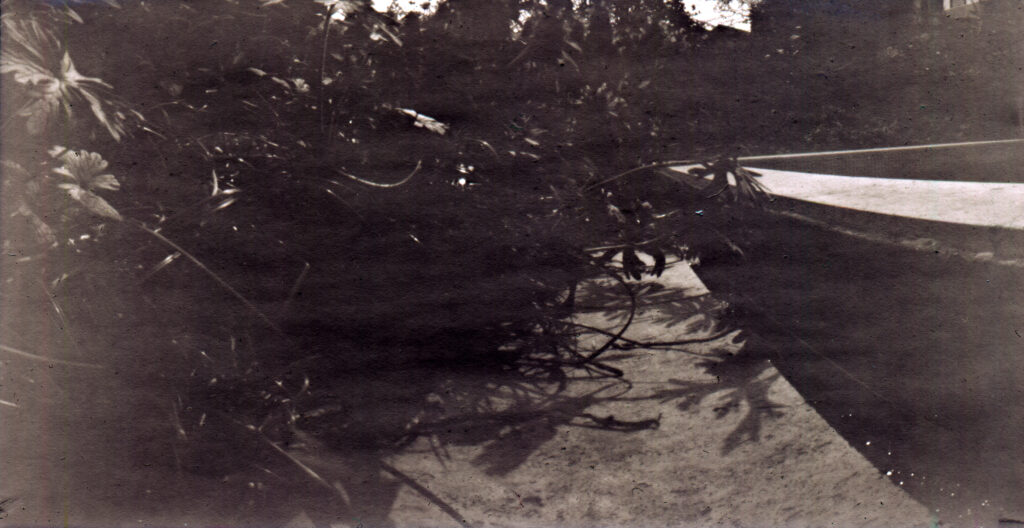
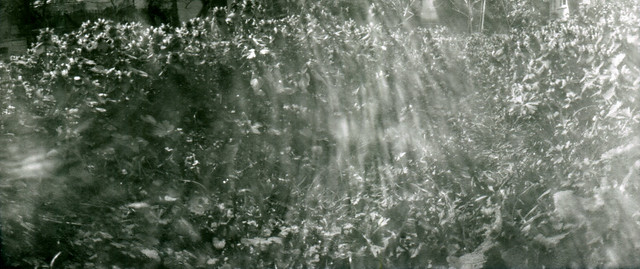
I can’t seem to stay away from pinhole photography these days. After experimenting with pre-cut paper negatives, I decided to use the first pinhole camera I’ve made with full size paper negatives only. The papers I have (13 x 18 cm) fit nicely in the tin can and one really appreciates the wide angle while using the whole paper. Here’s the last shot I took:
before the spring // f:220, 14min exposure, home made Rodinal (1+19)
There is some vignetting in the frame, as the pinhole dimension slightly mismatches the focal length yet it somehow works for the composition. This is my favourite pinhole shot by so far but there’s a long way to master the subtleties of paper negatives. The paper renders the colours in a very unusual way. It’s hard to learn to see this way.
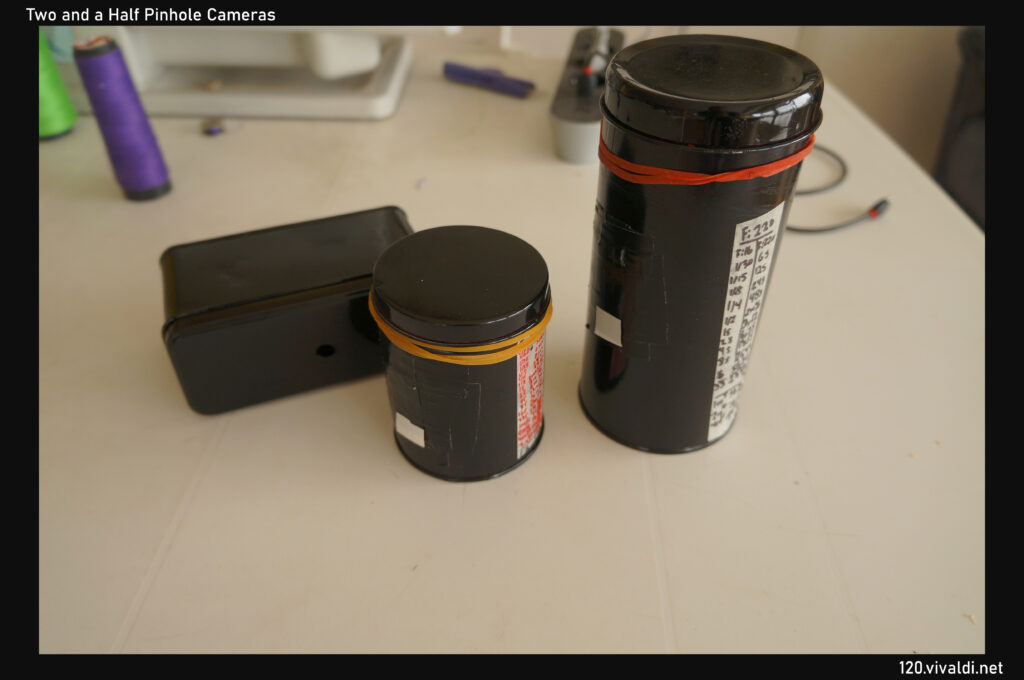
To be able to shoot smaller size negatives, I worked on two additional pinhole cameras. “Number 2” (smaller tin can/tube) is for shooting half a paper while the unfinished, rectangular “Number 3” is for shooting one third of a full paper. Number 2 has a pinhole of f:221. I’ll try to make a similar size pinhole for “Number 3” , so I can leave all the cameras pointing at different scenes, exposing for the same duration. Each camera has a simple list of exposure calculations. The left column is the exposure values for f:16 and the right column is reserved for the equivalent values at f:220/221. I take a reading using my trusty Soviet light meter at f:16 and expose for the corresponding time. Simple and works fairly well. I used mrpinhole’s site for exposure calculations.
Number 3 (unfinished), Number 2 and Number 1. The white tip is for removing the electrical tape. Elastic bands secure/keep the shutter ( electrical tape) open during the exposure.
For the next shooting session, I hope to test Number 2 in seaside.
Three shots from my last session. I’ve had a little hiccup when I misread the exposure table under red light. The first shot is severely under exposed. The second one is just about right in terms of exposure. The weather was cloudy and the readings were on par with the result. The third shot is a bit of a surprise. It was exposed at 12 minutes, like the previous one. The weather has abruptly changed during the exposure, revealing a strong sun. That change may have something to do with veiling/flaring. I like that little surprise…
abo // severely underexposed / f:220, 1. 30 min exposure / dev. in HM Rodinal (1+20) / Epson V33 scan (dusty!) / Conversion in PS (no spotting) oba // f: 220, 12 min. / high clouds /Epson V33 (dusty) scan, Conversion, Spotting, Crop in Photoshop
ebi//f: 220, 12 min. / changing weather Epson V33 (dusty) scan, Conversion, Spotting, Crop in Photoshop
I’m hoping to hit the seaside for my next pinhole session. Curious to see how paper negatives would render the waves!
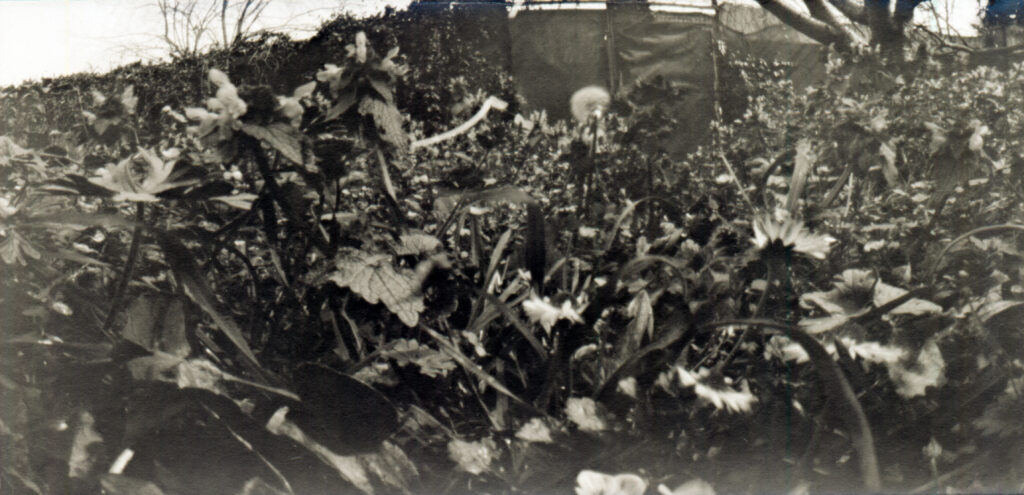
35 min exposure , f:220 pinhole overcast/cloudy weather Ancient Neobrom FB paper rated@ 2 ASA home made Rodinal (1+20) Epson V33 scan Conversion, spotting, white balance/curves editing in Ps
I’ve started cutting my papers (13×18 cm) in three equal pieces. Resulting negs have an almost “cinemascope” quality. A horizontally oriented aspect ratio (nearly 1:2.33!) is a known territory for me, so I get a little bit of better control over the shots. Also, having three chances in taking different photos with a single paper, allows me to test different lighting/composition options. After exposing these paper negatives, I develop them in a tiny container with 100ml of water and 5ml of home made Rodinal. A single paper means a shorter session. I think, I’m happier with this workflow for pinhole photography.
My last session was a long one. There were many tests waiting to be conducted. I was eager to learn more about the limits of my photo papers when used as paper negatives. I wanted to see what happens when I use a smaller paper negative in my tin can pinhole camera. I was curious about the difference between in Caffenol and home made Rodinal in less than ideal working conditions (in winter mode). I was anxious to try using my found Polaroid Land camera (which you can read about, scrolling further down). Would paper negatives be a breath of fresh air for that obsolete toy? I also wanted to give contact printing paper positives a second chance, in dry form this time (again, for the wet tests, you can scroll further down.)
And I managed to try all these things with mixed success and great fun. I basically spent the whole day shooting and printing. It was a cold and dark day but also a fruitful one. It taught me a lot.
gull vision // 27 min 40 seconds @f:220 /fb paper negative27 min 40 sec exposure @ f:220 (cloudy afternoon) Paper neg had a rough time during development. Things were too experimental… Caffenol (adapted CH) + home made Rodinal (1+20) scanned with a dusty Epson V33 @2000 dpi conversion, cropping, spotting, framing, compression in PS
First, the pinhole result. The neg is smaller than half a paper. It’s also placed horizontally. This is my first long exposure and I like the result. There were plenty of problems during the development so I’ve ended up cramming the paper in the tiny container that I’ve filled with home made Rodinal. My original idea was to test Caffenol as a paper neg developer, thinking that it’s gentler characteristics would balance the strong contrast of my photo papers. Nope. I was way off. Caffenol did not work at all. I’ve developed dozens of photos with Caffenol. I have my own adapted formula which works well (in optimal temperature) and I like Caffenol’s staining. I guess winter conditions were not up to Caffenol’s taste. In the end, I started developing a few shots in Caffenol, later to switch to Rodinal. Post Caffenol, Rodinal worked mightily and very quickly. I think Caffenol worked at some level, since Rodinal’s effect was much more abrupt than I usually get developing prints. I don’t know if mixing two home made developers worked. I don’t know how if they did. For now, I decided to use Rodinal in the winter and go with Caffenol in summer time. I’m also thinking about using Rodinal for prints and stick to Caffenol for film. Since it’s easier/faster to control film tank’s temperature, getting consistent results with Caffenol wouldn’t be a problem.
I liked the photo above and I think I’ll keep cutting paper negs in smaller, horizontal pieces. This can make the shooting experience more agreeable for me as I never cared much for vertical framing. This would also be a less costly way.
I’ve shot three test photos with Polaroid Land Camera. There were a few hiccups in the beginning. I wasn’t able to solve these issues but I went with the plan anyway. First of all, the camera has a funky tripod hole. It’s standard sized but it’s somehow shallow. The camera’s foldable case/cover also prevents a firm fit. Another issue was that I had no shutter cable. Well, I had one but apparently, it vanished in the sea of time. Along with affordable films and obscure cameras that nobody else cares…End of the ramble. Moving on. The third issue was the weather. The moment I started cutting papers and preparing solutions was apparently the moment weather decided to turn. When I had the camera ready, the weather was simply rotten. In the end, all these yapping means one simple thing: blurry, underexposed photos. Nevertheless, photos that work as a proof of concept. It is possible to use paper negatives in a Polaroid Land Camera. The process is relatively hassle free but the execution requires refinement…mucho refinement.
test shot number 2 . I took this at the exact spot I shot the pinhole negative above. Notice how dramatically different the POV of the pinhole camera is. // 3 or 4 seconds of hand held exposure in lousy, overcast weather. Scanned @ 2000 dpi Conversion/Resize in PS
And now here’s something a bit wilder:
test shot number 3 / 2 to 3 seconds hand held @ f:9. Overcast/waning light Thin paper negatives scanned and edited in PS for more contrast (or drama!)
This one had it’s fair share in a spent developer. At that point I was in the darkroom for hours and with no heating both the temperature of the solution and the room went down. The light was waning and the whole mess resulted in this shot. It’s very dramatic and it has it’s own eerie charm. I think this one was a win for the day!
So about the Polaroid Land Camera. Was everything bad? Not at all! I tested the camera , blocking the electric eye with a piece of electrical tap. For good measure, I blocked it further with my finger. The camera is uncomfortable to hold and combined with my weird grip, depressing the heavy shutter was a bit of a chore but, and that’s a big but, keeping the shutter depressed while keeping the electric eye covered meant that I’ve had a Bulb mode. There’s a cable shutter slot above the shutter and pressing the cable shutter and locking it would mean a breezy experience in pseudo-bulb mode. Given that the tripod socket is secured and that’s a whole another story. But, I’m sure I’ll get there. I still don’t know if the lens is worthy of use though. It has a funky shaped monster fungus right in the middle. I’ll know once I rule out the camera shake.
What else? Contact printing paper negatives, yes. Before the session, I’ve prepared a nice little setup to contact print paper negatives. I read different accounts about the exposure intensity and light source position. Earlier, I’ve had limited success with my enlarger’s light bulb, removing the film carrier and the lens. This time, I wanted to test a halogen light source that I’ve found in the storage room. It had a nice, adjustable base which I secured on top of my working desk, using double sided tape strips on the long shelf over my enlarger. I taped a thick piece of synthetic foam and thoroughly cleaned a glass panel. I was fairly happy with the preparations and when the time to contact print dry negatives came, the halogen bulb got busted. I carried the neg.-pos.-glass sandwich under the enlarger and my metronome run out of juice (it’s wound up). My audio player stopped working while I was counting seconds and things went on in this fashion. There were many mishaps, hiccups, cock-ups with the contact printing step. In short, it didn’t work well. But, in the faint prints, I can see that with stronger exposure and a fresher developer, it’s possible to get good results. Wet contact prints came with weird water spots/blotches and dry ones were free of those. At one point, I’ll return to dry tests using a new bulb/lamp.
I’m thinking about making another, smaller pinhole camera. I’ve also been reading about reversal methods for paper negatives. If I manage to pull that off, I can bypass contact printing for having unique, no lens paper positives. I really like the idea. There are 120 negs that I want to print. So yeah, many things to try. I wonder what will be next post…
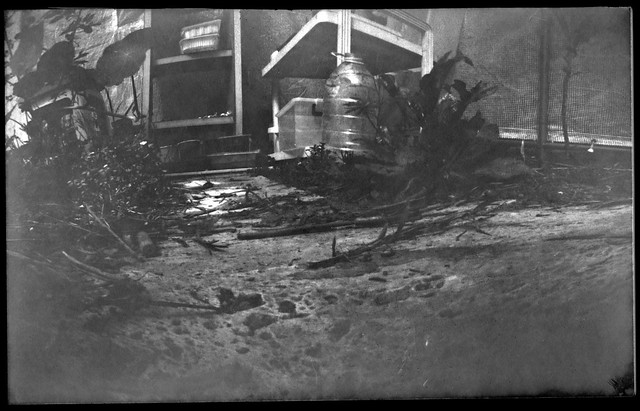
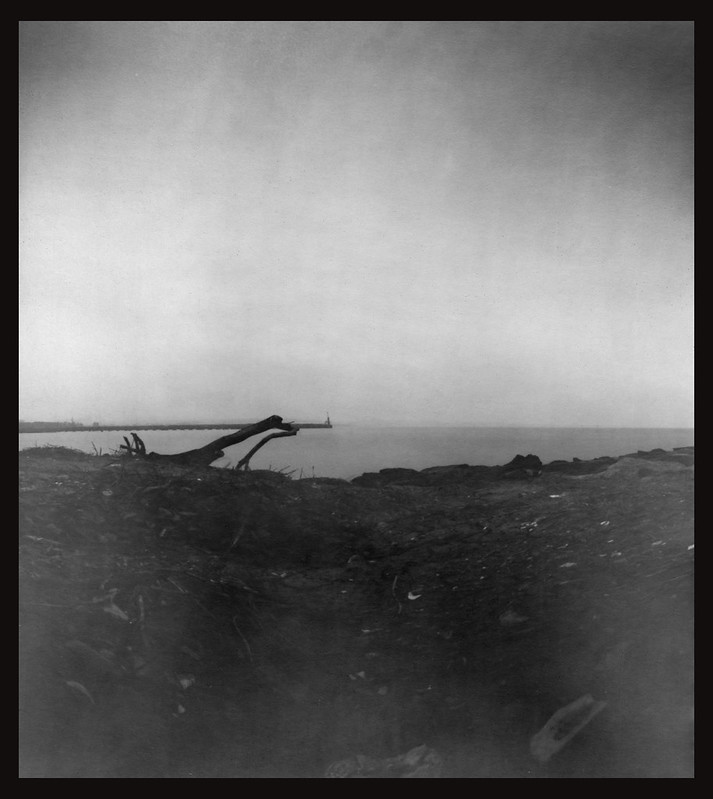
A scan of the paper negative from my third pinhole session. I’m still trying to figure out how to properly contact print paper positives so let’s call this scan a placeholder for it’s real paper positive version.
Home made pinhole camera (f:220)/ 7 min 30 sec exposure (foggy-overcast day) / Ancient Neobrom FB paper as paper negative / Developed in home made Rodinal (1+21.5) / Scanned with an absurdly dusty Epson V33 @ 2000dpi / conversion, heavy spotting, cropping, framing in LrC & PS
I was anxious to try my pinhole camera a second time. The day before shooting, I painted the camera body (i.e tin can) in black, using a cheap spray paint . Before shooting, I fastened the slightly improved (f:220) pinhole on the jet-black tin can, using a healthy amount of duct tape. The camera ended up too black. So I added a tiny strip of white tape on the shutter ( a piece of electrical tape, covering the pinhole) to be able to see what I’m doing. Under the red light, I took a photo paper, cut it slightly to fit the tin can’s (ahem! camera’s) height and went outside.
My aim was to come up with some kind of starting point for the exposure. Determining the speed of paper negatives is tricky at best. Determining the speed of ancient paper negatives, produced before the fall of Czechoslovakia is a whole another thing. I’ve read that, freshly produced modern photo papers are rated at 6 to 12 ASA. I went with 2 ASA. Feeding the pinhole calculator from mrpinhole’s site with 2 ASA and guesstimating that the weather (foggy with soft edged shadows) required a bit more exposure, I’ve chosen 3 minutes as the starting point. It was a bit short and I accidently moved the camera during exposure. Regardless, I was able to see some tone separation in the paper negative, after developing it in Rodinal (1+20). I also realized that painting the can eliminated flaring problem. I was excited for the second run.
For the next shot, I moved the camera somewhere more blue . As the photo papers are more sensitive to blue light, I decided to compose the shot with blue elements. The sky and the blue mosaics of a swimming pool. These were the blue things I had at the moment. As the last negative was a bit under-exposed, I decided to expose the shot for 7 minutes. It was a good guess and second shot was much better.
In the darkroom I realized that the paper negative was smudged by black spray paint. The spray paint I used wasn’t the best one and it turned out the paint did not dry properly after 24 hours. The paper was marked but it showed beautiful dynamic range. I was able to see good blacks and some healthy whites under the red light. I developed the paper, judging the time by eye. After inspecting it under the normal light, I became anxious to try printing positive of the shot. If I did that, the result would be a completely lens free photo, from shot to positive print.
My idea was to contact print the negative. The process is more or less the same with contact printing negative films with a small caveat. Since the emulsion sides of two photo papers has to contact each other closely, contact printing positives was traditionally done wet. The process is as follows: The paper negative is developed. The blank/unexposed paper to be used as positive print is submerged in water, next to paper negative. The papers are stuck together, emulsion side to emulsion side. The excess water is drained/squegeed. Paper sandwiched is placed on a softish surface , a heavy glass is placed on top of the sandwich. Papers are exposed under naked light. Positive print is peeled off and developed as usual.
Negative and positive image, all in paper!
I was anxious to try this process. Usually I learn things with baby steps. This time, I felt that I had luck and I went straight ahead to print a positive image. I had no idea about the exposure time I needed for contact printing paper. Paper is not transparent. I use fibre based papers which are fairly thick. The papers are old and they require lot’s of light in normal use. Normally careful testing would be the sane thing to do. But I played by the ear and went with 100 seconds as the exposure time.
Before exposure, I cut the soiled part of the paper neg, getting rid of the spray paint. The negative and the positive was stuck effortlessly. I did not try to squegee the papers. It felt somewhat tricky and my expectations wasn’t high. I just wanted to see a result. I removed the lens and the film carrier so my enlarger became a big lamp for this shot.
I developed the positive image as usual in my home made Rodinal (1+20). I was happy to see the positive image. It turned out that the water that was trapped between glass panel and the papers had it’s effect on the print. Some parts of the image were doubled, like the results of a camera shake. The print looked like it needed a bit more exposure but all in all, it was a great finale for the day. I exposed and printed my first no-lens, no-film shot.
Here’s the scanned & converted negative. f:220, 7 minutes, home made Rodinal (1+20), Epson V33 scan, conversion/crop in PS
I went in the darkroom to see some pinhole test results. After deciding to refine the camera before shooting new paper negatives, I printed a shot that I’ve been curious about. It’s a shot of an empty lot. It has a nice dynamic range. Being the first frame of the roll, it’s also the only one which isn’t plagued by Fomapan 200’s mottling and micro tears.
Around 130 seconds in Rodinal (1+20). Constant agitation // Water+ white vinegar stop// Ilford Rapid Fixer// Sodium Sulfite as hypo-clear // 5min running water
I’m not sharing a proper scan of this shot, since I’m not entirely happy with the outcome. The exposure needs a bit tweaking and the composition is much better uncropped. Next time, I’ll go with the full negative and hopefully share a final print that I’m happy with.