
At last, I took my pinhole cameras to the seaside. I was curious about how my usual haunting grounds are recreated through the pinholes. I put Pinhole camera No:1 and No:2 on the rocks, facing opposite sides, exposed for eight minutes and enjoyed the salty breeze while waiting. Apart from funky splatters on one of the negatives, due to a slight mishap with undiluted Rodinal, I was very happy with the results. Gradually I feel more confident with the exposure and my eyes are getting acquainted with the pinhole perspective. The second, smaller pinhole camera that I’ve made works well, I like the aspect ratio of ~13:10 that it uses and I discovered that the spirit level I’m using has a magnetic strip! If I manage to paint proper framing lines on the top of the lids, I’d have everything I can think of.
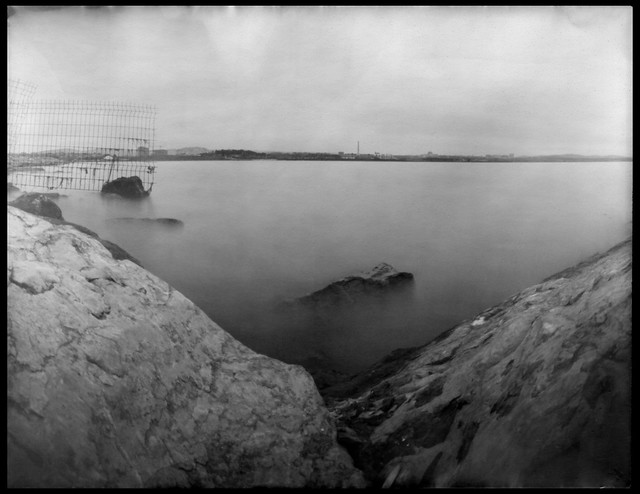
f:220, 8 min exposure
FB Paper Negative rated @2ASA
Approx 13×10 cm
Dev. in home made (paracetamol based) Rodinal (1+20]
Scanned in Epson V33 @2000 dpi
Conversion & Spotting in PS

f:221, 8 min exposure
FB Paper Negative rated @2ASA
Approx 8×13 cm
Dev. in home made (paracetamol based) Rodinal (1+20].
Scanned in Epson V33 @2000 dpi
Conversion & Spotting in PS
*Messy splatter textures are caused by a mishap with undiluted Rodinal. I’m tempted to recreate the accident in a more controlled manner, to add texture to paper negatives.
My next session will be an adventurous one. I just ordered ingredients for reversal bath. I’m planning to shoot paper negatives (always with pinhole) develop them, bleach and re-develop to get paper positives. If I manage to pull that off, I’d have unique photos, created without any lens or mechanical contraptions. I truly like the idea. My home made Rodinal is nearly depleted but I think I’ve got just enough for two more sessions.
Wish me luck and take care!
120